Installing A Tripod On The Roof

How To Install A Tv Antenna Tripod
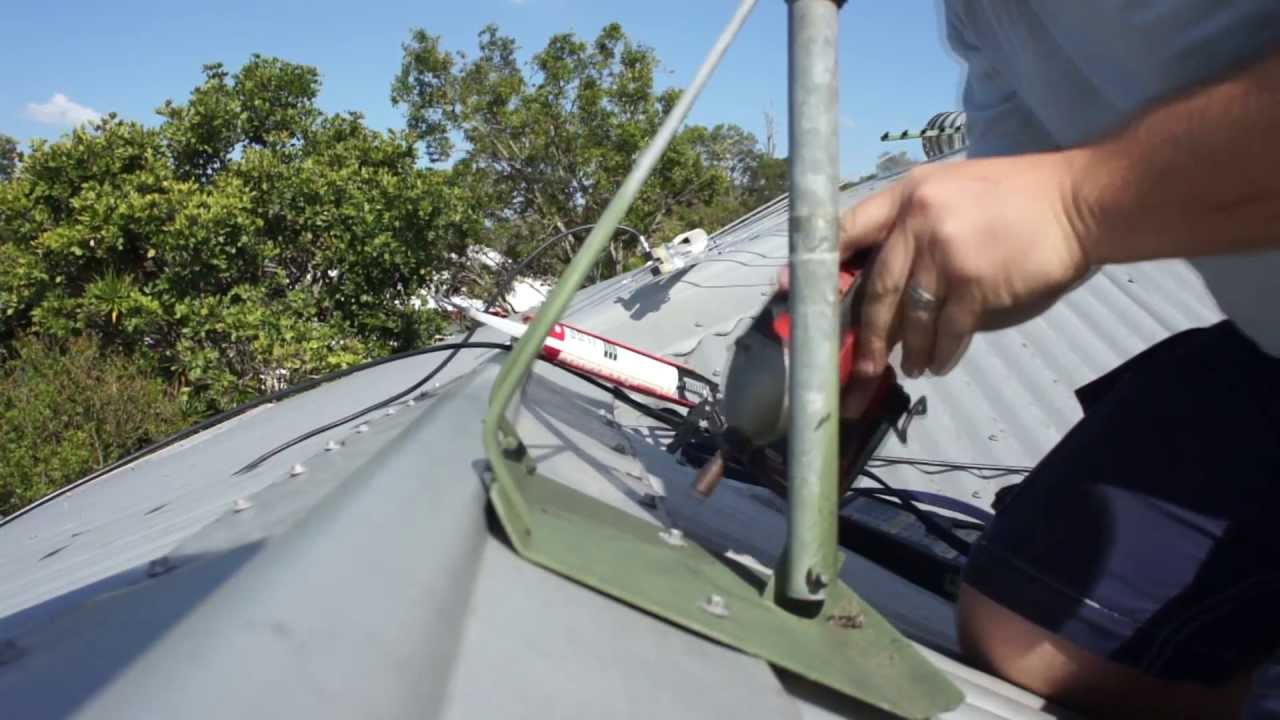
Antenna Installation Using A Tin Roof Tripod Youtube
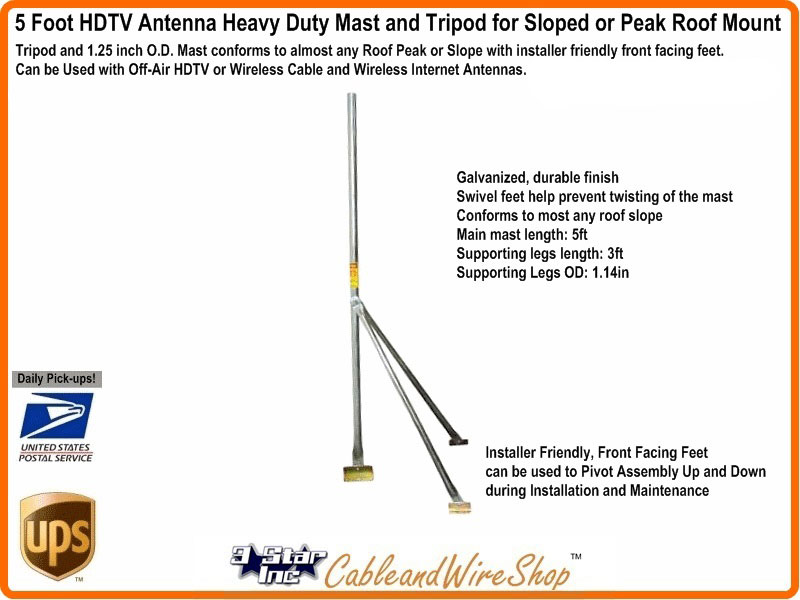
5 Foot Tripod With Antenna Mast For Sloped Or Peak Roof Mount 3 Star Incorporated

How To Install A Metal Roof Tripod Mount For A Tv Antenna

Ham Cb Roof Antenna Tripod Install Youtube

Antenna Installation Solid Signal

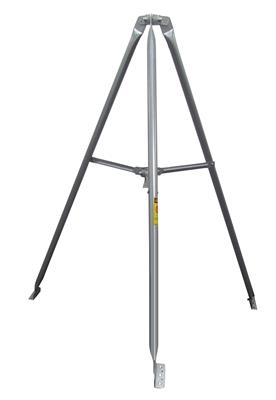
Unfold the tripod legs and loosen pipe support bolts.
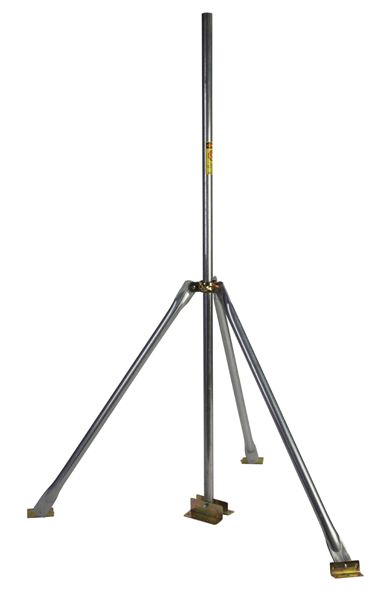
Installing a tripod on the roof.

How To Install A Tile Roof Tripod For A Tv Antenna

Wireless High Speed Internet Installation Pictures

Amazon Com Ambient Weather Ez 46 3 Tar Pad Kit For Roof Tripod Installation Home Kitchen
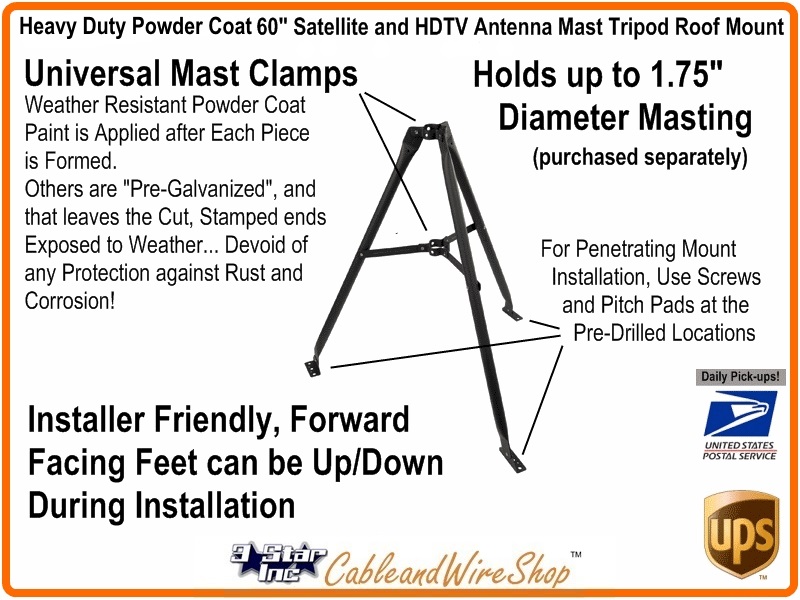
60 Inch Roof Mount Tripod For Antenna Mast 3 Star Incorporated

How To Install Tv Antenna On Roof The Simplest Methods Gadget Infinity

Tripod Antenna Mount

Tv Antenna Installation Guide Solid Signal

Tripod Roof Kit Manualzz

Amazon Com Pitch Pad Kit Mastic Pads 3 For Roof Antennas Tv Mounts Tripods And Satellite Dish Installation Home Audio Theater
10 Foot Roof Mount Tripod For Telescopic Antenna Mast 3 Star Incorporated

Eagle 5 Ft Tripod Mount Antenna Mast Slope Or Roof Peak Roof Mounting Legs 1 1 4 Inch Tube Size
Rohn Tripod Roof Towers Trt60 Free Shipping On Most Orders Over 99 At Dx Engineering

Tripod Mount For Large Antennas Dish 5ft 2ft Heavy Duty Adjustable Mast Options

Tv Antenna Tripod Apply Roof Seal Pads Tv Antenna Antenna Tv Antennas

Another High Volume Waterbuck Pump Installation This Requires Just A Simple Tripod 1 Ton Chain Hoist And A Pair Of Pro Water Well Off Grid Living Water Pumps

Amazon Com Pitch Pad Kit Zinc Grade 5 Steel Lag Bolts 6 And Mastic Pads 3 For Roof Antennas Tv Mounts Tripods And Satellite Dish Installation Electronics
10 Ft Antenna Mast Pole With Tripod Roof Mount 1 25 Od Ez Tri 10

Amazon Com Tri 3 3 Ft Tripod Mount Kit Antenna 1 9 16 Inch O D Mast 27 Inch Long With 3 15 Inch Anchors Fit Pipe Mast Up To 1 3 4 Inch Industrial Scientific
Https Encrypted Tbn0 Gstatic Com Images Q Tbn 3aand9gctcc4vfjuyj1r18ey8qoxf Olfmfqlyo9iqpdytnlagjy2ocwet Usqp Cau

Rca Outdoor Antenna Tripod Mount Rooftop Antenna Tripod Mount

Perfect Vision Pvtp2 2 Ft Roof Top Tripod Mount Pvtp2 With Images Tripod Mount Tripod Roof

Skywalker Sky6030 5 Ft Roof Top Tripod Mount Sky 6030 By Skywalker 33 97 Heavy Duty 5ft Antenna Tripod Permanently Mounts An Anten With Images Tripod Mount Tv Antennas

Installation Equipment Splash Wireless Internet Llc

What To Expect On Installation Day Unwired Broadband Inc
Source : pinterest.com
