How To Insert A Glass Door In Revit

Glass Pocket Door Revit
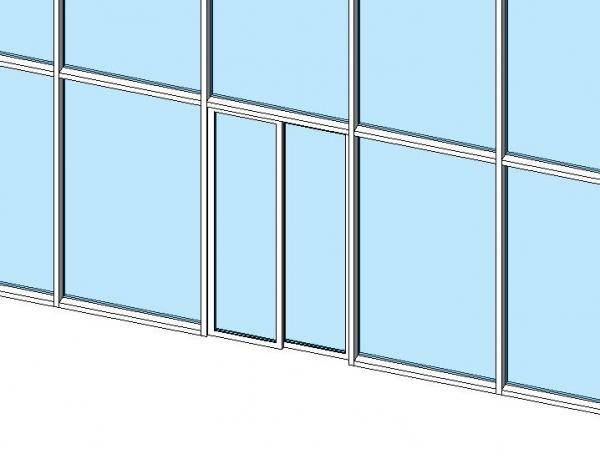
Revit Placing A Door In A Curtain Wall Youtube

Frameless Glass Door Revit Object Frameless Glass Doors Glass Door Glass

Object Curtain Wall Four Panel Sliding Door Sliding Doors Wall Paneling Doors
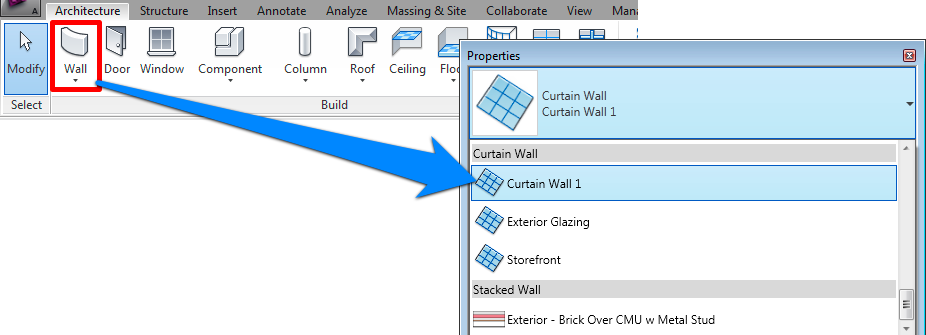
Adding A Door To Curtain Wall Learning Revit

Revit 2018 Tutorial Placing A Door In A Storefront Youtube

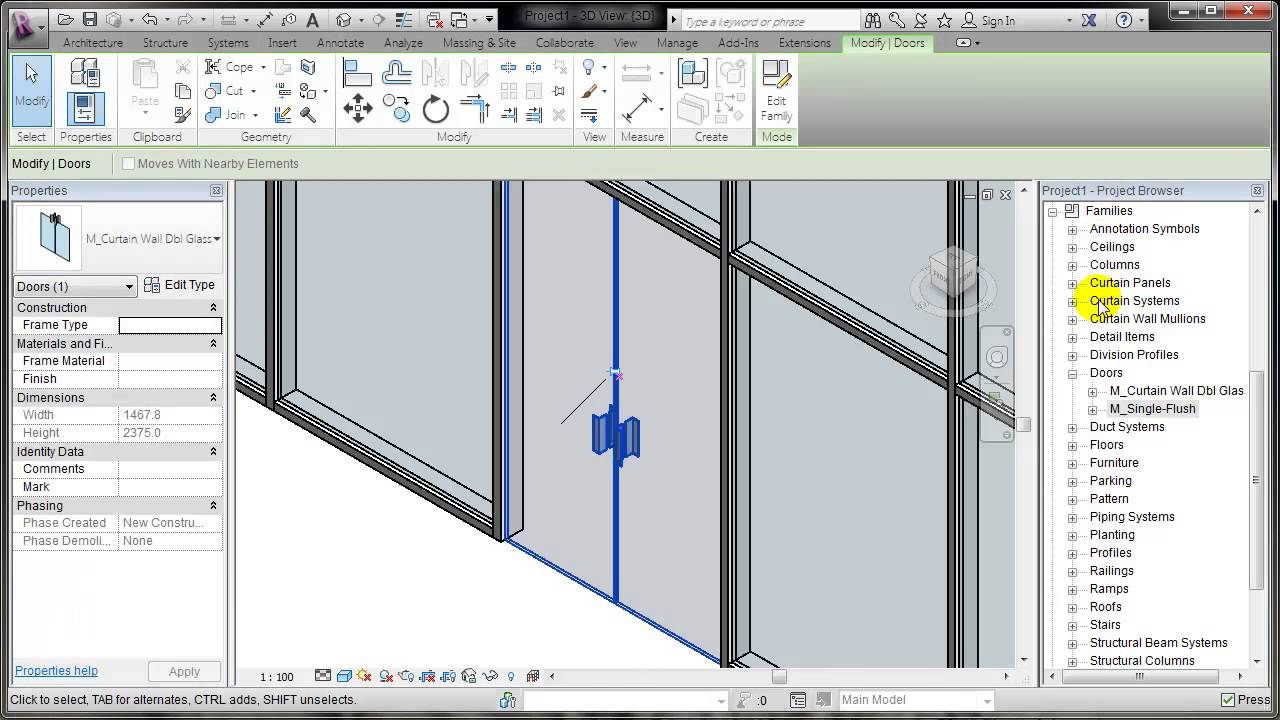
First off you ll need to load the curtain wall door into the project.
How to insert a glass door in revit.
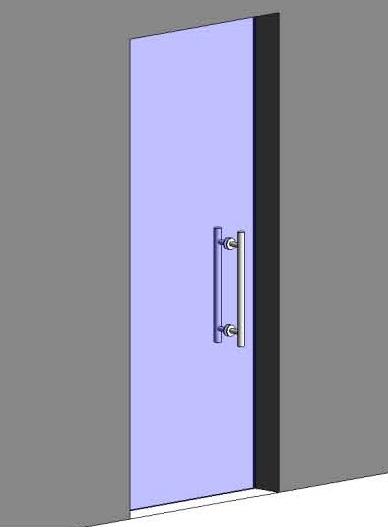
Revitcity Com Object Frameless Glass Door

Curtain Wall Shop Front Door Revit Model Front Door Shop Curtain Wall Curtains

Best 48 Reference Of 3 Panel Patio Door Price In 2020 Patio Doors Sliding Glass Doors Patio Sliding Patio Doors
Video Add A Door To A Curtain Wall Revit Products 2019 Autodesk Knowledge Network

Revit Tips Easy Louver Window Making Louver Windows Revit Tutorial Architecture Program

Object Sliding Door Pocket Door Glass Glass Pocket Doors Exterior Pocket Doors Exterior Doors With Glass

Revit Tutorial Glass Door Parametric Family Youtube

3d Model Free Revit Window And Door 3d Models For Revit Arhitektura Ikea Mebel Mebel

Revit Autodesk Creating A Curtain Wall With Double Doors Youtube
Autodesk Revit Tutorials 08 Adding Doors Revit Tutorial Autodesk Revit Tutorial

Moving Door Styles For Bedroom Homes Tre Glass Door Glass Doors Interior Sliding Glass Door
Revitcity Com Object Sliding Curtain Wall Door

Revit How To Create A Profile And Wall Sweep In 2020 Wall How To Plan Sweep

Revit Tutorial The Revit Kid Create A Door Part 4 Revit Tutorial Kids Create Building Information Modeling

3 Panel Sliding Glass Door Revit In 2020 Glass Doors Patio Sliding Glass Doors Patio Folding Patio Doors

Pin On Garage Art Studio

Glass Sliding Door Detail Google Search Glass Barn Doors Sliding Glass Barn Doors Door Detail

Bimsmith Market French Door Quad Outswing Oxxo French Doors Doors Oxxo
Https Encrypted Tbn0 Gstatic Com Images Q Tbn 3aand9gcq Lulxslpt9h76bq2zkbhvllfhyar Ccerxavef Cdqw Txred Usqp Cau

Revit Tutorial Sliding Glass Door Fixed Window Youtube

Autodesk Revit Tutorials 08 Adding Doors Revit Tutorial Autodesk Revit

Area Plan Area Types Areas How To Plan Type

Bimethods 20131126 Class29 Youtube Revit Tutorial Facade Architecture Architecture Model

Window Treatments For Sliding Glass Doors Patio Door Curtains Patio Doors Curtains
Source : pinterest.com
